
So, sit back and enjoy the continuation of the tour.
Request Management/Approvals
A big part of being an RA is naturally approving requests. To begin with, let's take a look at the Manage Requests screen. You'll notice four tabs:

- To Approve - a list of all requests that you as a logged in administrator may approve or deny
- Pending Approval - a list of all currently pending requests to which you have view access, including those that you may approve yourself.
- Processed - a list of past requests to which you have view access.
- Custom Search - a standard search screen, allowing you to filter and search through all requests to which you have view access.
So let's return to the scion of the Widget fortune and our example from the last blog post, Alan Widget and his quest for certificates. So you'll remember that his enrollment request was sent of for approval? Well, over on their end the ever friendly neighborly RA administrator was on the case. Receiving an e-mail notification about Alan's request, they log in to the RA and check the To Approve-tab.

As expected, here we see Alan's request waiting for review. Clicking on the Review-link, the administrator is shown all pertinent information having to due with Alan's request.

We could mention here that we've only set up a simple cumulative approval profile for this action for the sake of simplicity. We could have also used the more complex partitioned profiles which were introduced in EJBCA 6.6.0, but I'll probably write a bit more about those in a future blog post.
You'll notice that there is an edit button at the bottom of the screen, which allows the administrator to edit some information in Alan's request. Doing so would invalidate the administrator as an approver though, as they would be considered party to the request itself. Instead they choose to approve, which changes the request's status to Executed, will send a notification mail off to Alan and allow him to retrieve his certificate.

Heading over to the Processed-tab, the administrator can now see Alan's request listed, and likewise under the Custom Search-tab.


Search Functions
That ends the final epic saga of Alan Widget and his quest for certificates, so we'll move on to the remaining pages on the RA interface in EJBCA 6.8.0. Clicking on the Search option in the top menu reveals two choices: Certificates and End Entities.

Certificate Search
Being able to search for certificates is a brand new feature in EJBCA, and is only implemented in the RA interface. It provides options for searching for partial matches against Subject DN, SAN, username or against the full serial number. Certificates can also be filtered by end entity profile, certificate profile, issuer and status.

Extra search options include specifying more results to be shown per screen and mechanisms for searching for more precise issuance, expiry and revocation dates. Note that result size is restricted to avoid murdering the database. I would also like to point out that the listed certificates will be restricted to those CA to which the RA is authorized to.
End Entity Search
The End Entity search is gives roughly the same options as the certificate search screen, and will likely feel familiar to those of you used to the End Entity search screen from the CA interface.

CA/CRL Overview
The CA Certificates and CRL screen remains largely unchanged from the public web.

Notice from the screenshot that the WidgetCorp SubCA is slightly indented to show that it's subservient to the WidgetCorp Root CA.

Notice from the screenshot that the WidgetCorp SubCA is slightly indented to show that it's subservient to the WidgetCorp Root CA.
Role Management
The last screen to review is the Role Management screen, which was first introduced in EJBCA 6.8.0. Clicking on the menu will show two options: Roles and Role Members.

At this point you may be wondering why we've moved roles management out into the RA interface, when there is an excellent (well, more or less) equivalent already written in the CA interface? Well, for many use cases this won't make much sense, in particular when CA and RA are on the same machine. It starts getting interesting when the CA is located in a secure environment, using one or many RAs placed in the DMZ to communicate. As these would by bare minimum be physically separated and in different security zones, this allows senior RA administrators some freedom to administrate their own personell, without being forced to enter the CA security zone. This functionality becomes even more pertinent when CA and RA are physically separated, or not even being operated by the same business entities.
Roles
The roles screen will display a table of all roles to which the current administrator and RA are authorized to see, sorted by name and namespace. The standard options for editing, deleting and cloning roles exist, as well as for creating roles and reviewing role members.

If we click on Create New Role will bring us to the following screen, which will be similar for editing or cloning.

Notice that what you see is a simplified rules management screen, restricted to only RA functions and access to Certificate Authorities and End Entity Profiles.
Role Members
Had we instead clicked on the Members link in the previous table, we would have ended up in the same screen as the Role Members menu option. Displayed is a table of all available role members which this RA and administrator is authorized to view, which can be further narrowed down by identifier (common name, certificate serial number, etc), role or CA.
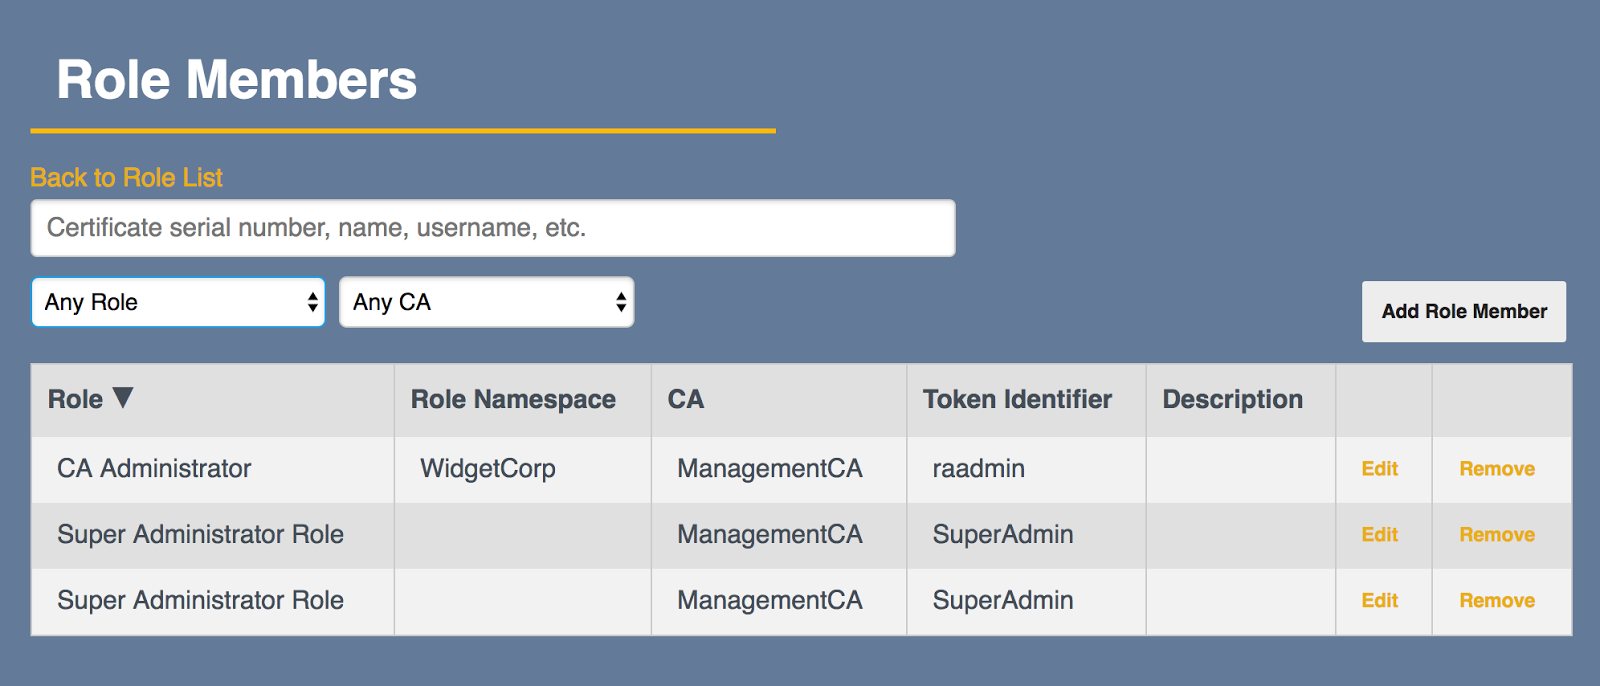
Choosing to add a role member will lead us on to a familiar screen where we can specify role for the member, what CA has issued the certificate for that member and by what means we identify that certificate. There is also a field for making remarks pertaining to that member.

That brings us to the end of our tour for the EJBCA RA as implemented in EJBCA 6.8.0. I hope that you've learnt something, and you'll join me in future blog posts as we add and modify functionality. We're not done yet though! Fact is that the EJBCA RA is not only a fancy new user interface, but part of a brand spanking new feature: for EJBCA Enterprise customers an instance of EJBCA can be set up to act as a synchronous external RA for another EJBCA instance acting as CA, communicating securely using EJBCA Peers, even through a one-way firewall.
Will we introduced this functionality back in EJBCA 6.6.0, in the next blog post I'm going to explain how such a setup would look like on an architectural level, and provide an easy walkthrough for how to set it up!
Cheers!
Mike Agrenius Kushner
Product Owner EJBCA


